Prototyping the iOS navigation bar in ProtoPie
Share:
This tutorial explains how to prototype the default iOS top navigation bar so that it shrinks when scrolling. Here’s the finished interaction we’ll be making.
Like many designers, I use Figma for designing app screens. I also stay in Figma when prototyping, as Figma prototypes are fast and easily shareable.
But occasionally, I require a more realistic prototype. That’s where tools like ProtoPie come in handy. ProtoPie allows you to add complex transitions, animations, sounds, device features (like using your device camera in a prototype!) and more.
One interaction I find myself repeatedly needing to put in a prototype is the shrinking top navigation bar, found in most iPhone system apps, and many other iOS apps that make use of that default component.
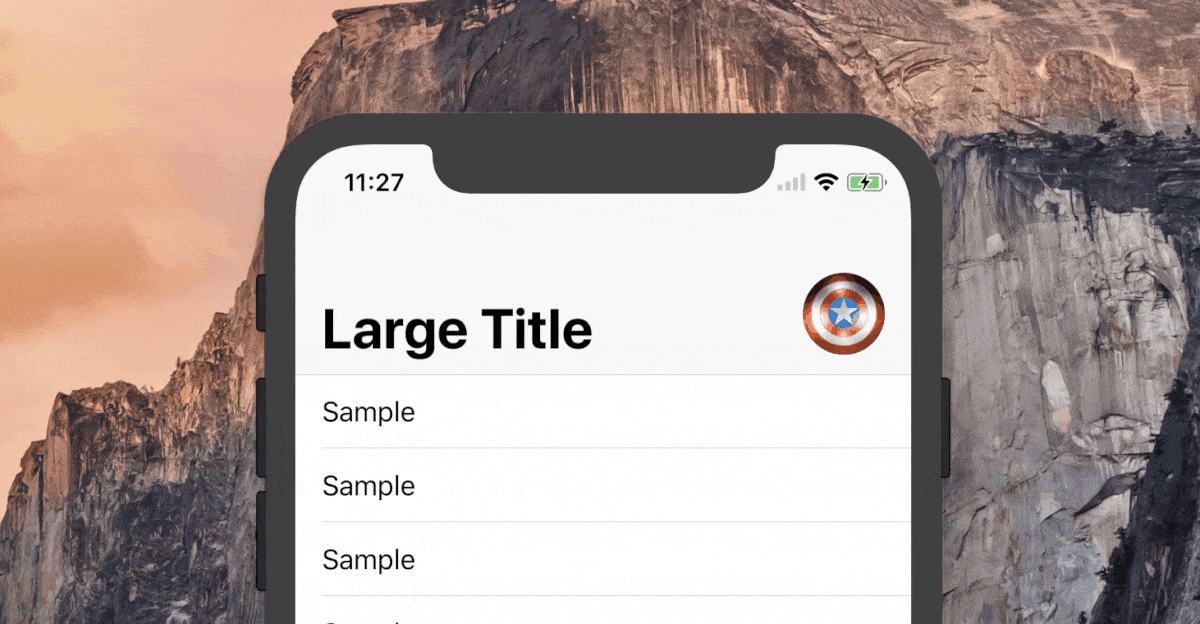 In this tutorial, we’ll just be creating the Title change that you see here.
The interaction can be broken down like this:
- When scrolling down
- ➡ The top bar shrinks to a fixed height
- ➡ The large title disappears from the top left (scrolls out of view)
- ➡ The same text appears fixed to the centre of the new, shorter top bar
And when scrolling back up to the top of a screen, the reverse applies.
While Figma has scrolling frames, the only way to prototype this is hacky. I made it work by first tapping to switch to a ‘closed top bar,’ before scrolling, but it’s wholly unsatisfying.
So this is where ProtoPie comes to play. Using ProtoPie, this interaction is possible to prototype in a single scene that elegantly animates correctly while scrolling, without having to link out anywhere or affect any other parts of your prototype. (A ‘scene’ is basically a single screen or frame in ProtoPie, with a timeline of interactions and animations.)
If you haven’t used ProtoPie before, you can grab a free trial here. It works on both Windows and Mac.
Step One: Arrange in Figma, and send to ProtoPie
If you create your designs directly in ProtoPie, you can skip this step. If you want to copy my Figma file, click here.
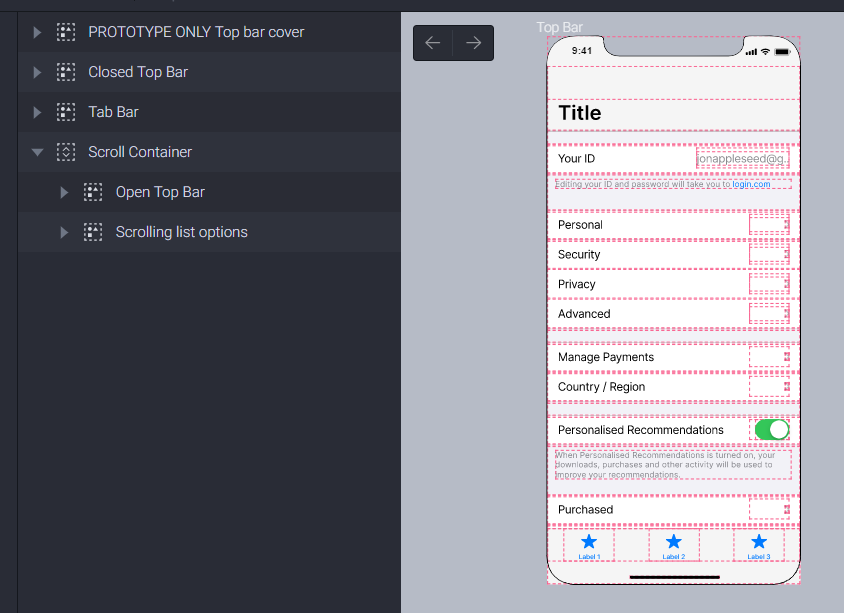
Group your layers in Figma like so:
- A frame for the closed navigation bar
- A frame with a rectangle that covers the closed navigation bar. This should start below the status bar and end above the title text of the open navigation bar. See this picture:
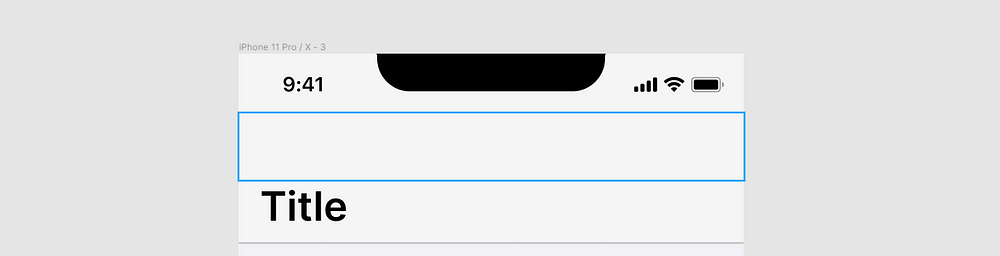 This is where the ‘cover rectangle’ should be positioned
- A frame for the open navigation bar
- A frame for your scrolling content
- A frame for the bottom navigation / tab bar
Here’s a screenshot of those layers. You can also duplicate my Figma file here.
 The layers to send over
When this is all set up correctly, go ahead and export your Figma frame into ProtoPie, using the official plugin.
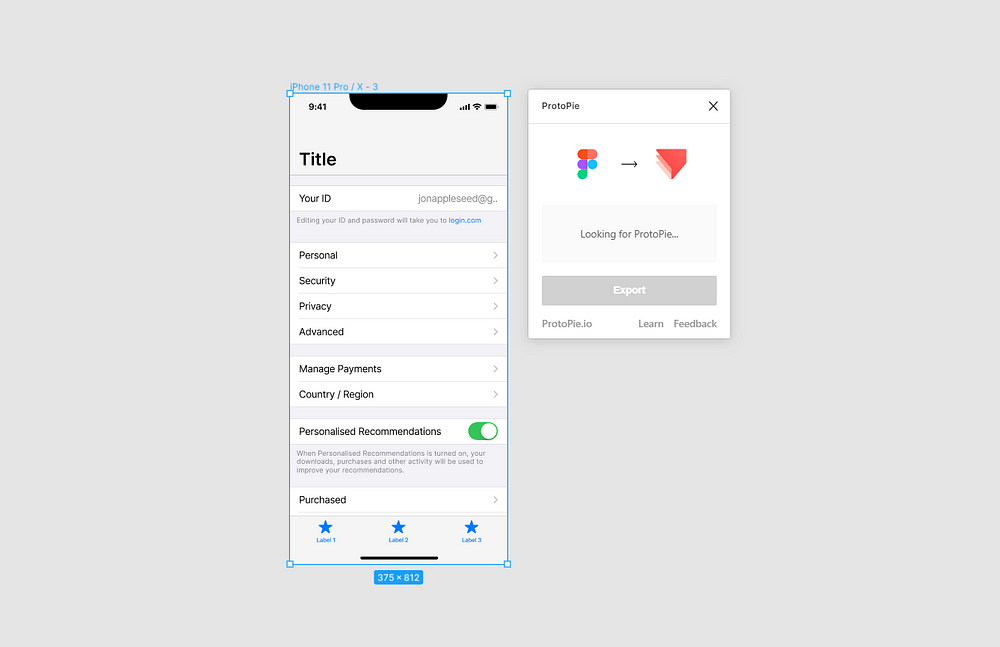 The official ProtoPie plugin
Step 2: Arrange layers in ProtoPie
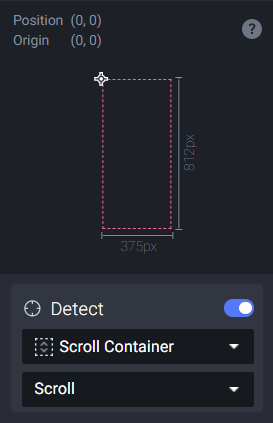
Now that you’ve imported your frame into a ProtoPie scene, you can start arranging them properly. Start by creating a Scrolling Container, and resize it so that covers the entire scene. Place the Open Top Bar and Scrolling Content inside of that container.
Step 3: Add Triggers and Responses
Every interaction in ProtoPie is made up of object, a trigger and a response. Add a Detect trigger to your Scroll Container, and set it to detect the Scroll property of the Scroll Container object.
This means that the subsequent responses will run whenever the amount of scrolling is changed.
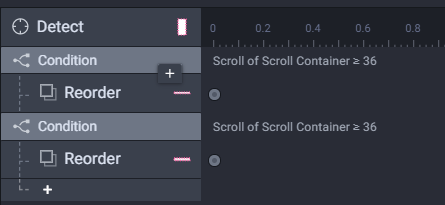
Add a condition, and set it to the following:
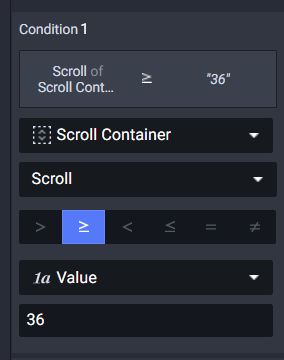
This means that it will run the next response whenever this condition is true. Namely, whenever the Scroll Container has been scrolled past 36pts down, it will run a response. (Depending what phone size you’re building for, you might need to experiment with the value — I found that 36 works well for the iPhone X.)
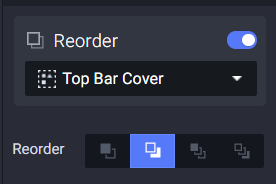
Lastly, add a Reorder response, that reorders the Cover layer to behind the Closed Top Bar layer:
Lastly, repeat the process in reverse: when the scroll property of Scroll Container is ≤ 36, reorder the Top Bar Cover to be in front.
When you’re done, this is the full interaction you’ve made:
What next?
This interaction only works with tap-and-drag scrolling, like you would do on a phone. When using the ProtoPie on a computer, if you scroll with a gesture on a trackpad, the interaction can mess up.
Moreover, the interaction doesn’t easily support translucent backgrounds (as you’ll have overlapping layers with different opacities, meaning the opacity will double up), or a bottom border drop-shadow (as it appears too early). These can easily be fixed by adding more conditions to control when opacity changes happen, but I left them out of this tutorial to make it easier to follow.
You can test out the finished interaction, and download a copy of the ProtoPie file here: https://cloud.protopie.io/p/3922f8c0f4