Reduce your phone usage by automating grayscale
Share:
I’ve tried lots of ways to reduce my phone usage: custom wallpapers, a rubber band around the case, time tracking apps, pause/breathing apps that make you wait a few seconds when opening specific apps.
I think it’s almost impossible to try living without a smartphone in the present world. Moreover, an important part of my job is continuously testing and checking the digital products and websites I’m helping to build.
However, excessive phone usage is easily the biggest problem in my life.
And I don’t think I’m to blame. Phones and the apps on them are designed to be irresistibly addictive. The neuroscientist TJ Power describes having a phone in your pocket like being a packet of sugar that you can keep dipping into. It’s unreasonable for the responsibility to fall on the person to not use it, when armed with something which is so fundamentally addictive.
One method that has had some moderate success is putting my phone in grayscale mode. I think this is for two reasons:
- When pulling out my phone, it serves as a reminder I shouldn’t be using it beyond the intended use case
- While using my phone, it makes it less appealing. It reduces the dopamine hit from the apps on it.
This setting can be found on most Android phones under Settings → Accessibility → Colour and motion → Colour correction.
However, I still need to use my phone in colour sometimes — say, for checking Google Maps, or checking how something has been implemented on my company’s website. And having a toggle switch easily available made it too easy to revert back.
On my Android phone, I previously experimented with four ways to toggle this grayscale setting:
- Adding a widget to my homescreen
- Adding a quick settings tile, reached by pulling down the notification shade
- Using the accessibility floating button
- Pressing and holding both volume keys
Of these, the last added the most friction - as it requires holding down for a second instead of instantly tapping.
But invariably, once I’d turned full-colour back on, I’d forget to turn my phone back to grayscale, and get lost to the doomscrolling once more.
So I worked out how to automate it. I found having my display flick back to grayscale every 20 minutes was ideal — 20 minute windows of colour are enough for checking something on a website I’m building, or checking traffic when driving somewhere.
Here’s how I did it:
This setup uses the Android app Tasker.
Part A: Give Tasker WRITE_SECURE_SETTINGS permissions. Skip this if you’ve already done it before, or if you’re using the Tasker Permissions app.
- Install ADB on your computer (official links from Google below):
- Enable USB / Wireless Debugging and pair phone
- Settings → About Phone → Tap Build number repeatedly until developer options are available
- Settings → Developer Options → USB Debugging / Wireless Debugging
- Connect a cable to your computer (if using USB debugging), or run
adb pair HOST[:PORT] [PAIRING CODE]from a terminal (if using wireless debugging)
- From a terminal, run
adb shell pm grant net.dinglisch.android.taskerm android.permission.WRITE_SECURE_SETTINGS
Part B: Adding a profile and task in Tasker:
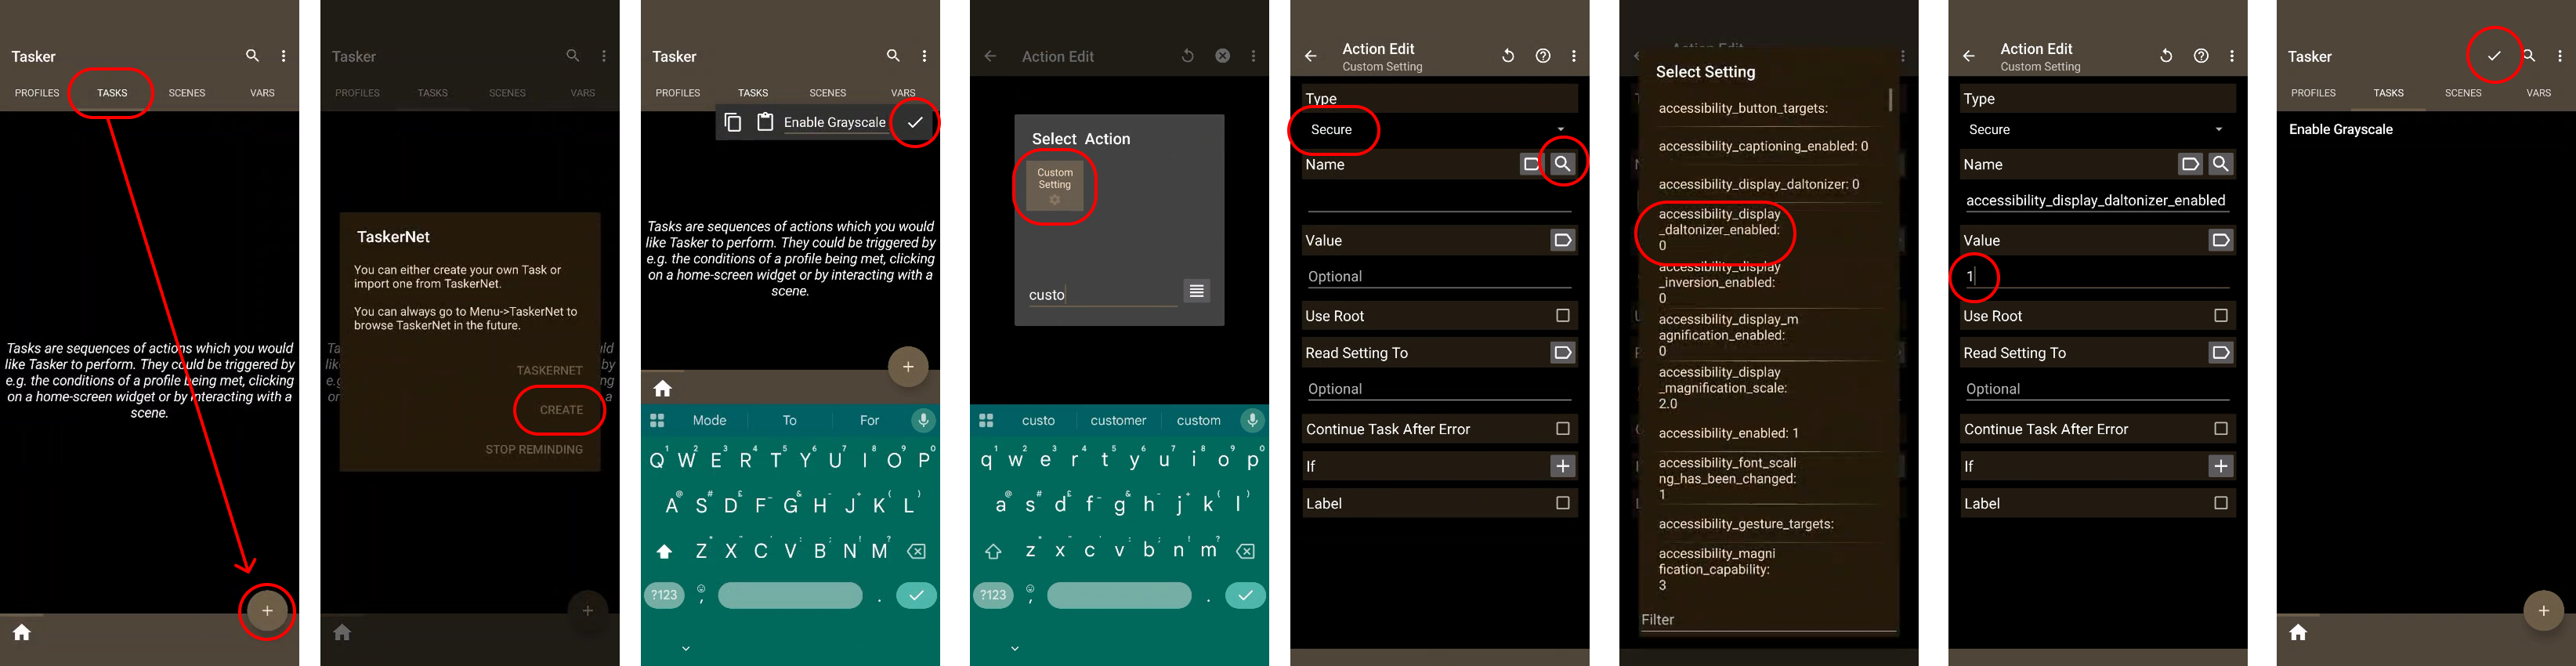
- Under Task tab
- Add a new task, called Enable grayscale
- Filter for custom setting
- Set Type to Secure
- Search for a setting name, and select accessibility_display_daltonzier_enabled
- Set the value to 1
- Press back twice to return home and press the check mark to save
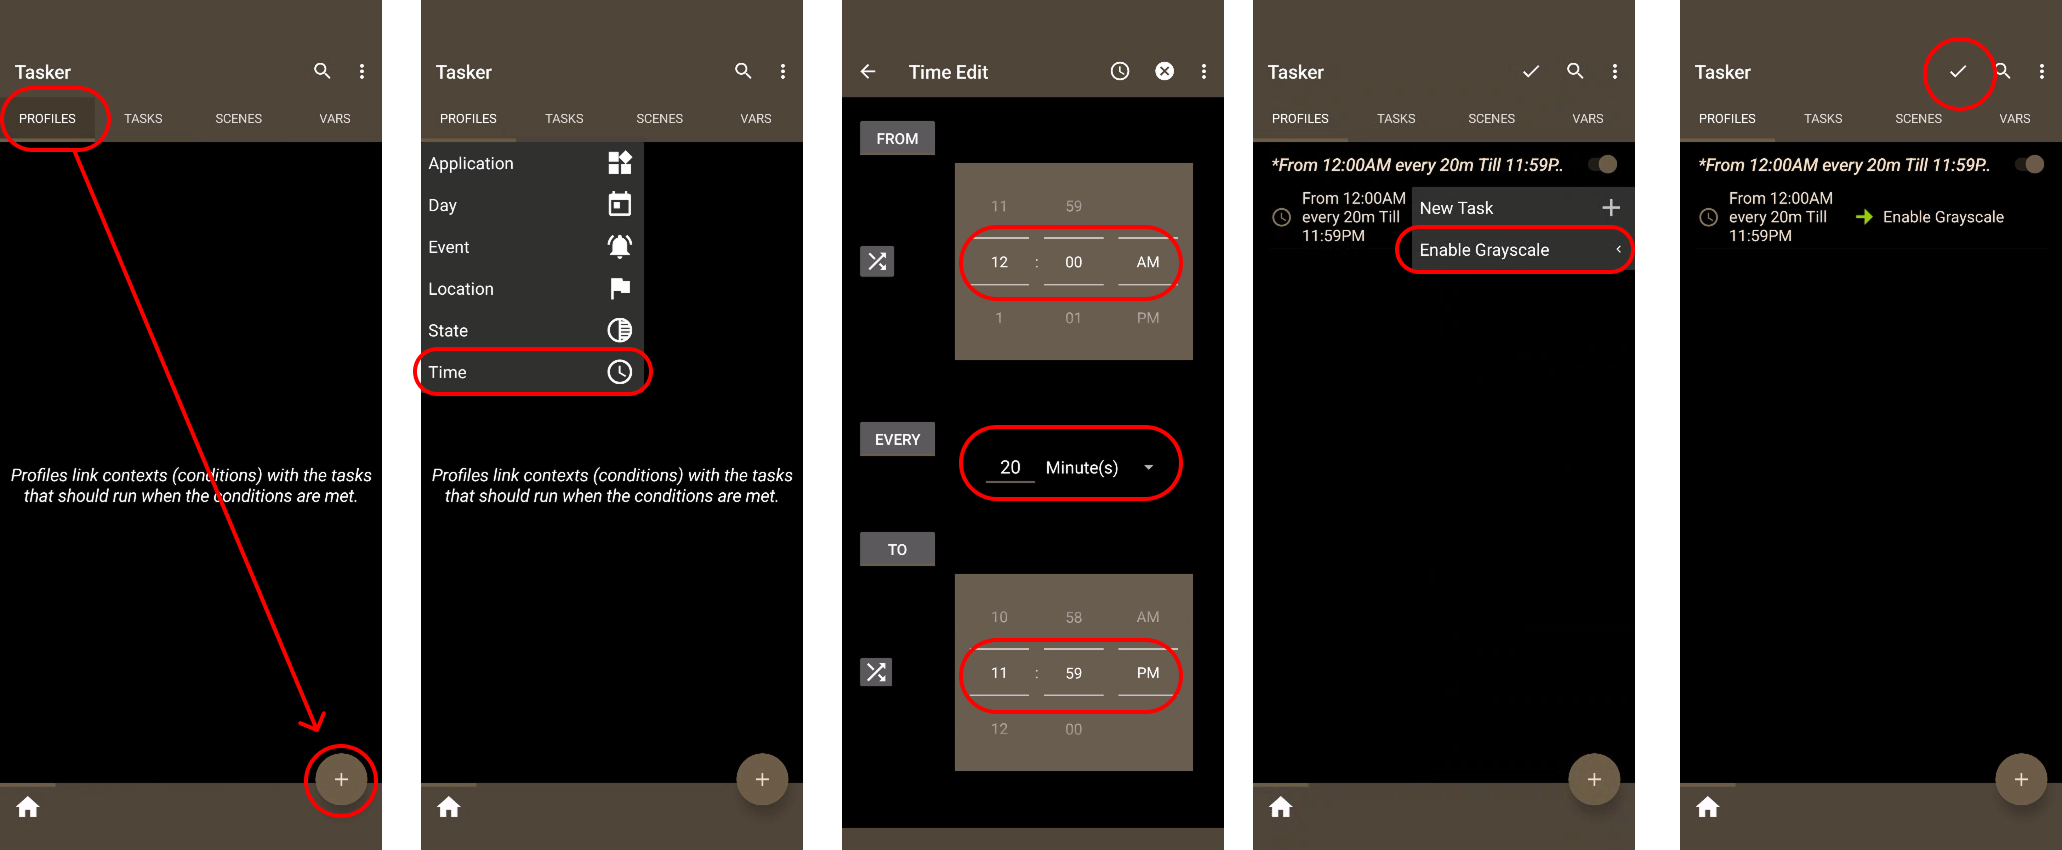
- Then, under the Profile tab
- Add a new time-based profile that runs from 00:00 to 11:59pm
- Set it to run every 20 minutes
- Press back
- Link it to the task you just made
- Save by pressing the checkmark